DIGITAL AUDIO RECORDERPLAYER WITH EDITING Model DR-554-E OWNER'S MANUAL EIGHTH EDITION (Firmware Version 2.
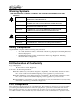
Warning Symbols THE FOLLOWING WARNING SYMBOLS ARE USED ON THE PRODUCT IN THIS MANUAL: ENGLISH ATTENTION: REFER TO OWNER’S MANUAL FOR IMPORTANT INFORMATION. FRANÇAIS ATTENTION: VEUILLEZ VOUS RÉFÉRER AU MODE D’EMPLOI POUR UNE INFORMATION IMPORTANTE. ITALIANO ATTENZIONE: FATE RIFERIMENTO AL MANUALE PER INFORMAZIONI IMPORTANTI. ESPAÑOL ATENTCION: FAVOR DE REFERIR AL MANUAL DE OPERACION POR INFORMACION IMPORTANTE. ENGLISH WARNING: ELECTRICAL SHOCK HAZARD.
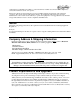
equipment in a residential area is likely to cause interference in which case the user will be required to correct the interference at his own expense. This device will accept any interference received, including interference that may cause undesired operation. The user is cautioned that changes made to the equipment without the approval of the manufacturer could void the user's authority to operate this equipment.
Trademarks And Patents 360 Systems, 360 Systems Instant Replay, and DigiCart are trademarks of 360 Systems. "Dolby" is a trademark of Dolby Laboratories, Inc. Zip is a trademark of Iomega Corporation. Software contained in this product is copyrighted by 360 Systems, Microware Systems Corp. and Dolby Laboratories, Inc. Designs incorporated in this product are the subject of current or pending U.S. and foreign patents.
TABLE OF CONTENTS INTRODUCTION ................................................................................................................... 8 GETTING STARTED ................................................................................ 8 Cuts, Hot-Keys and Banks .......................................................... 8 Cut Index Numbers.................................................................... 9 The "Find" Function..................................................................
Selecting and Playing a List ...................................................... 25 Editing the Playlist.................................................................. 25 To remove a Cut from the Playlist:..........................................................25 Changing the Playlist Playback Order “On-the-Fly” ..................... 26 Clearing the Playlist................................................................ 26 CHAPTER TWO – THE REAR PANEL...............................................
To Format the Internal Hard Disk .............................................. 49 FORMAT EXTERNAL DISK...................................................................... 50 To Format the External Disk ..................................................... 50 DEFRAGMENT DISK.............................................................................. 51 Defragment Disk Command ...................................................... 51 To Defragment the Disk.................................................
INTRODUCTION Thank you for purchasing Instant Replay. The system provides an unusual combination of mass storage, direct access to stored audio and ease of operation, all in a professional quality package. Key features include: • • • • • • Storage of up to 1,000 audio Cuts. • • "Find" function locates a Cut by entering its Name or Index Number. Twenty-four hours of storage. Assignment of Cuts to 50 front panel Hot-Keys. Playlists that store a sequence of Hot-Keys for manual or automatic playback.
The 50 Hot-Key Assignments are referred to as a Bank. There are ten Banks numbered 1 to 10. Each Bank is like a separate "page"; changing Banks is equivalent to flipping a page, and presents a different set of Hot-Key Assignments. Note that the ten Banks all have access to all the Cuts recorded in Instant Replay. Banks are a convenient way to organize Instant Replay's audio collection. The different Banks might contain sounds for different purposes, or they might be used by different people.
external drive can be used as a backup device, or to move cuts from one unit to another. Also, material intended for a specific purpose can be removed from the unit to prevent unauthorized use. The Copy features allow a single Cut, a Bank, or all Cuts on a Disk to be copied from one drive to another.
When playing Hot-Keys in rapid sequence, (three or more keys pressed within one second) changing between formats can cause playback errors which result in momentary noise output or momentary playback at an incorrect sample rate. When using 48K Linear or 44.1K Linear formats, playback and recording can only be performed on the internal hard drive. Linear Cuts can be copied to and from the External drive for backup and data transport. See the section on “Using an External Drive” on page 32.
CHAPTER ONE – Controls and Operations Instant Replay 1 1 2 2 Q 11 W 12 A 21 3 3 E 13 S 22 4 4 R 14 D 23 5 5 T 15 F 24 6 6 Y 16 G 25 7 7 U 17 H 26 8 8 J O 19 K 28 0 10 I 18 27 9 9 P L 20 L 29 30 BANK SELECT PREVIEW LOOP MENU SCROLL ASSIGN HOT KEYS PLAY LIST PAUSE CANCEL SCROLL FIND Z 31 32 X 33 C 34 V 35 B 36 N 37 M 38 - 39 ENTER PEAK LEVEL R 0 -3 -6 -9 -12 -15 -18 -21 -24 -27 INPUT LEVEL * 40 HEADPHONES SPACE 41
DISPLAY MODULE THE DISPLAY MODULE For most operations, the display shows the Index number, Cut Name, and the running time of the currently selected Cut. The currently selected Bank number is displayed in the lower right corner, followed by the Hot-Key Assignment of the current Cut. If the displayed Cut is not assigned to a Hot-Key in the current Bank, this number will be 00.
RECORDING OPERATIONS Transport Control Buttons The Transport Controls include STOP, PLAY and R ECORD. They perform in the traditional manner of tape recorders. Stop Immediately ends recording or playback. Stops some sequential operations, such as File Transfer and Copy Bank. Play Starts playback of the currently selected Cut. Note that pressing PLAY initiates playback from the beginning of the selected Cut, even if it is already playing. The exception is when PLAY is used to disengage PAUSE .
Metering and Level Controls Level Meters The LEVEL METERS show the current record or playback level. The LEVEL METERS are not affected by the setting of the rear panel O UTPUT ATTENUATOR switch. Input Level Controls The Left and Right I NPUT L EVEL Controls set the levels for recording. Set the levels so that the loudest part of your recording causes the first red segment of the meter to light. When turned all the way down, no sound will pass.
Press the ENTER key to make an adjustment. ENTER/ADJUST OR PLAY HEAD 0_.00 Press the ENTER key, then use the CURSOR keys to move the cursor to the digit to be adjusted. Then use the NUMERIC keys (top row of Hot-Keys), or the SCROLL keys to make an adjustment to the numeric value. Press MENU or CANCEL to return to previous menu level, or the SPACE key to reset the Head to 0:00. Or Press the PLAY key to start playback, the displayed Head Point time value will increase from the current Head Point position.
ADJUST FADE IN FADE IN 00.00 Press the ENTER key to make an adjustment. Fade values are expressed in duration of the fade. Fades are limited to a maximum length of 40 seconds. ENTER/ADJUST OR PLAY FADE IN 0_.00 Press the ENTER key, then use the CURSOR keys to move the cursor to the digit to be adjusted. Then use the NUMERIC keys (top row of Hot-Keys), or the SCROLL keys to make an adjustment to the numeric value. Press MENU or CANCEL to return to previous menu level.
Adjust Output Gain Cuts also contain an Output Gain value, which allows you to adjust and store the playback level after the recording has been made. You can adjust output gain in 1 dB increments from +6 dB (twice as loud) to -90 dB, which is close to the softest sound that can be recorded. Use the MENU, ENTER, and SCROLL keys to navigate to the Adjust Output Gain menu. Menu | Editor | Adjust Output Gain ADJUST OUTPUT GAIN 0 dB Press the ENTER key to make an adjustment.
If this Cut is already assigned in this bank, that assignment is cleared. Note that the Cut is not erased. You do not need to clear a Hot-Key before assigning a new Cut, assignments can be simply overwritten. The same audio Cut may be assigned to keys in different banks. If a Cut is assigned to keys in several different banks, reassigning a new Cut to one key will not disturb assignments in other banks.
• • • To insert a new Step into the Playlist, use the SCROLL ARROWS to select the position within the list, then press a HOT-KEY to add the new Step. To remove a Step from the Playlist, use the SCROLL ARROWS to select the Step, then press CANCEL to remove it from the list. Press ENTER to confirm, or CANCEL. To append a Step to the end of the Playlist, SCROLL to the end of the list and press additional HOT-KEYS to add additional Steps.
Pause PAUSE interrupts playback of a Cut. When pressed again, playback will resume. TTIIPP:: Cueing up Cuts Silently using Pause Note that while Instant Replay is paused, pressing a Hot-Key displays the Assigned Cut’s title and statistics, but the Cut will not play until PAUSE or PLAY is pressed. Several Hot-Keys can be pressed in series to see what Cuts are assigned to them, allowing the Hot-Key Assignments to be reviewed silently. Only the last one pressed will play when Pause is released.
MACHINE SETUP MENUS Default values are UNDERLINED. All settings are saved on disk and restored on power up. Editing Menu Adjust Head Point – 0.00 Adjust Tail Point – end of file Set Fade In Length – Range is 0.00 to 40.00 Set Fade Out Length – Range is 0.00 to 40.00 Set Tail Pre-roll – Variable from 1 to 9 seconds. Default is 2 sec. Adjust Output Gain – Variable from +6 to -90 dB. Default is 0 dB. Refer to the section, “Audio Edit Operations” on page 15 for more information about these settings.
Printer Output Menu Printer Type – CANON BJ200E, HP LASERJET Print Current Bank Sort By NAME, INDEX, HOTKEY #, PLAYLIST Print Legend Overlay Sort By NAME, INDEX, HOTKEY #, PLAYLIST Print All Sort By NAME, INDEX, HOTKEY #, PLAYLIST Note: Sort By appears as a sub-menu after selecting PRINT CURRENT BANK, PRINT OVERLAY, or PRINT ALL. Refer to the section, “Printer Port” on page 30 for more information about these settings.
Refer to the section, “File Transfer Menus” on page 40 for more information about these settings. PLAYLIST OPERATIONS Creating a New Playlist To create a new Playlist: Enter Playlist mode by pressing the PLAYLIST button. It will light, and the display will show: LIST IS EMPTY SELECT HOT KEY • Press the H OT-KEY you want to use as the first entry. The display will indicate the Step Number, ID Number, Cut Name, running time and Bank/Hot-Key assignment. The HOT-KEY flashes to indicate it is next to play.
Cut, the playing Cut will stop and the next Cut will play immediately. The sequence will continue in this manner until the end of the Playlist, or until the PLAYLIST button is turned off. If LOOP is on, individual Cuts will loop until LOOP is turned off, STOP is pressed, or PLAY is pressed. If Play is pressed, the next Cut in the Playlist will begin looping. Follow-On Playlist Characteristics If the Playlist Type is FOLLOW-ON, the PLAY button will play the first Cut in the Playlist.
• Press the H OT-KEY that corresponds to the Cut you want to insert. It will be inserted immediately after the position you selected, and the Playlist will increment to display the new Cut. To append a Cut to the end of the Playlist: • • SCROLL UP through the list until you see END OF PLAYLIST. Press the appropriate HOT-KEYS to add additional Cuts to the list.
CHAPTER TWO – The Rear Panel INSTANT REPLAY REAR PANEL ANALOG OUTPUT LEFT RIGHT GPI/PLAY AES/EBU DIGITAL IN OUT MODEL # IEC-958 II AES 75 OHM ANALOG INPUT LEFT RIGHT OUTPUT ATTEN SERIAL # EXPANSION ITE EQUIPMENT IN 115-230VAC, 50-60Hz 1.2A MAX O OUT 360 SYSTEMS, WESTLAKE VILLAGE, CALIFORNIA, USA I PRINTER MADE IN USA ELECTRICAL POWER CAUTION! CONNECT THIS PRODUCT ONLY TO AN AC POWER SOURCE WITHIN THE VOLTAGE AND FREQUENCY RANGE INDICATED ON THE REAR PANEL.
Unbalanced connections should be made by connecting the unbalanced signal output to pin 2 of the Instant Replay and ground to pin 1, with pin 3 left unconnected. Audio Outputs The main ANALOG OUTPUTS are a pair of male XLR-3 connectors. The output is electronically balanced, and is capable of driving loads of 600 ohms or greater. Full scale output level is +25 dBu with the OUTPUT ATTENUATOR in the 0 position. Output cables should be wired the same as shown above for the inputs.
If the SAMPLE RATE CONVERTER is DISABLED, another mismatch condition can arise between the selected RECORDING FORMAT and the sample rate of the incoming digital audio. The AC-2 and 48K Linear formats require the digital audio to be input from a 48K source. The 44.1K Linear format requires digital audio to be input from a 44.1K source. Some digital audio equipment does not output audio data or flags. The data as invalid when not in play mode. This is most common in consumer CD players with digital outputs.
D-NET File Transfer Ports Instant Replay can transfer its files to other 360 Systems products and certain DAT recorders using the D-NET file transfer network. D-NET uses AES/EBU protocols, and the digital audio inputs and outputs described above. The choice between XLR and RCA input connectors is made as a menu selection. Both XLR and RCA outputs are always active during D-NET transfers. D-NET data is not standard digital audio, and may not be listened to.
Machine Setup Menus” for further information. The Printer port is also used to connect external storage devices such as an Iomega Zip drive that are designed to be connected to a parallel port. See the chapter, “Using an External Drive” on page 32. GPI/Play Remote Input Instant Replay includes a General Purpose Interface (GPI) that duplicates the PLAY button. It is on a 1/8” mini phone jack on the back panel. Connect a momentary switch (console button, footswitch, etc.
CHAPTER THREE – Using an External Drive Instant Replay 2.0 model DR-554-E offers the option of connecting an Iomega Zip 100 Parallel (or PC), Zip 100 Plus drive or Zip 250 Parallel Port (PC). This allows Cuts to be archived, transferred from one unit to another, or brought in from another 360 Systems product such as DigiCart/II Plus or Short/cut. While Zip 250 disks are compatible with Instant Replay, they are not compatible with DigiCart/II Plus for the purpose of file exchange.
OPERATION Format External Disk Before a new disk can be used, it must be formatted. Format is also a fast way to erase all the material on a disk in order to re-use it. Note that the Iomega Tools disks that come with some Zip Drives are not compatible with Instant Replay and will not format.
WRONG DISK FORMAT SELECT INT DRIVE? Pressing ENTER causes Instant Replay to reselect the internal hard drive. The SCROLL ARROW keys allow selection of other options in the second line of the display: FORMAT EXT DRIVE? Pressing ENTER during this display starts the format process. SELECT EXT DRIVE? Pressing ENTER during this display causes Instant Replay to try to relog the External drive.
To Copy a Bank: • • • Select the Bank to be copied Press Menu and select COPY BANK using the Scroll Arrow keys. Press Enter. The display will show: REPL DUPL INDEX? ENTER=YES, CANCEL=NO • Press Enter or Cancel as desired.
• • Press Enter or Cancel as desired The display will show: REPL DUPL NAMES? ENTER=YES, CANCEL=NO • Press Enter or Cancel as desired. The display will show: PRESS ENTER TO BEGIN STOP/CANCEL TO QUIT • • • Press Cancel or Stop to return to the menu OR Press Enter to start the operation.
See “Using an External Drive” on page 32 for information regarding special restrictions on Zip disk compatibility.
CHAPTER FOUR – D-NET File Transfer Operations Introduction D-NET is a new kind of audio network designed by 360 Systems. It uses Instant Replay's digital audio interfaces for high-speed audio transfers, and to backup and restore files for archival purposes. Unlike other networking schemes, there is no extra cost for networking cards or hardware, no special software, and it is compatible with other products such as routers and distribution systems that use the AES/EBU digital audio interface standard.
Backup/Restore Characteristics BACKUP BANK saves a specific bank to a DAT tape. BACKUP DRIVE saves the contents of the entire drive to a DAT tape. RESTORE FROM BACKUP adds files to the drive from the DAT backup tape, replacing any with the same Cut Index. RESTORE FROM BACKUP does not discard files on disk unless a file at the same Index is successfully read from the DAT tape.
Starting in the Middle of a Backup Tape You can start in the middle of a backup tape and Instant Replay will start restoring from the first full backup file it receives. This allows you to note the time that an error took place, and then start a restore operation a bit before the same location on a similar backup tape and get only the file that produced an error. See the section on Error messages for information of their meaning and possible corrective steps.
File Receiver Selects whether file reception is ON or OFF. When ON, an idle machine receives all file transfers specifying a destination name that matches the configured receiver name. When OFF, the machine does not receive file transfers. Echo During Receive Selects whether received data is passed through to the digital output. The ON selection is useful when machines are daisy-chained for file transfer.
PREPARING TO BACKUP STOP/CANCEL TO QUIT Backup begins and the display shows the current file number and the percent completion for the current file: FILE 1 OF 193 00% BACKED UP Backup will proceed until all files are backed up, and the display will show the total number of files. If STOP or CANCEL is pressed during backup the display changes to: QUIT BACKUP? PRESS ENTER/CANCEL Press CANCEL or STOP and the backup will continue. Press ENTER to stop backup. An ending summary will be displayed.
File Transfer Setup Procedure (First Time Configuration) • • • • • • • • Select the FILE TRANSFER menu. Use the SCROLL ARROW keys to select the FILE RECEIVER menu item. Press ENTER and then use the arrows to select ON to enable receiving of files. Press ENTER again to confirm the selection. If this Instant Replay is going to be used in a network with other units connected to its output, then you must turn on the Echo function. Use the SCROLL ARROW keys to select the ECHO DURING RECEIVE menu item.
• • OR Press ENTER to edit the Destination Receiver name. Enter a Destination Receiver Name using the HOT-KEYS as Alphanumeric keys The name specified as the destination machine may end with a single asterisk character (HOT-KEY 40) to indicate that all receivers partially matching the name should receive the transfer. For example, EDITBAY* will transfer to Receivers named EDITBAY 1, EDITBAY 2, EDITBAY 3, etc.
BEGIN TRANSFER • • PRESS ENTER/CANCEL Press Enter and the transfer will proceed. The display initially shows: PREPARING TO SEND STOP/CANCEL TO QUIT Once the transfer begins the display changes to: FILE 1 OF 1 00% COMPLETED If no buttons are pressed, the percentage is updated until an error occurs or the transfer is completed. The display then shows: TRANSFER COMPLETE PRESS ENTER/CANCEL • • To cancel a transfer in progress, press Cancel, then Enter.
After pressing ENTER or CANCEL the display briefly shows the number of files transferred without error: FILES SENT: 0 PLEASE WAIT If any files could not be sent, the display shows the number of files transferred without errors and the number of files not sent due to errors: FILES SENT: 0 FILES NOT SENT: 1 Note that Errors shown in the Transmitter are never the result of cabling or interface problems; they reflect a problem within the unit.
GOOD FILES: BAD FILES : 10 5 If an error occurs for a received file, the cause of the error is displayed briefly and the percent complete line on the display changes to: SKIPPING FILE The 'skipping' message remains on the display until a new file is received, or the transfer is complete.
On Instant Replay the TRANSFER DRIVE feature is really a transfer of the only Directory an Instant Replay has: Drive 1, Directory 0. Backup and restore are not provided in DigiCart/II machines.
CHAPTER FIVE – Maintenance and Disk Operations FORMAT INTERNAL HARD DISK The Format Disk option for the internal drive is only available through a special "power-on" sequence. This option will erase the entire contents of Instant Replay's internal hard disk It is essential to back up the contents of your hard drive using the D-NET File Transfer or Backup/Restore procedures detailed in Chapter 4 “D-NET File Transfer Operations” before beginning the Format Disk operation.
FORMAT EXTERNAL DISK The Format Disk option for the external drive accessed through the Operations menu. This option will erase the entire contents of the external disk. New removable disks such as Iomega Zip disks must be formatted before they can be used. The EXTERNAL DISK option in the CONFIGURATION menu must be set to ENABLED to perform any operation specific to the External Disk Drive. CAUTION! FORMAT DISK WILL PERMANENTLY ERASE THE CONTENTS OF THE DISK .
DEFRAGMENT DISK As Cuts are recorded and then erased, or overwritten by new recordings of different lengths, disk space will become fragmented into small blocks of free space separated by blocks of audio. Eventually, the available space is broken up into too many small blocks. When this happens, the message “DISK IS FRAGMENTED” can appear when RECORD is pressed. Another sign is the display of MAX LENGTH when going into Record, rather than TIME LEFT.
To Defragment the Disk • • Press MENU and use the S CROLL ARROWS to locate O PERATIONS. Press ENTER and use the SCROLL ARROWS to locate DEFRAGMENT DISK. Press ENTER, and the display will prompt: DEFRAGMENT DISK? PRESS ENTER/CANCEL • Press ENTER to proceed, press CANCEL to abort. If you press ENTER, the display prompts: ARE YOU SURE? PRESS ENTER/CANCEL • Press CANCEL to abort, or press ENTER to proceed.
INDEX AC-2 ™ .......................................................... 8 Assign Bank................................................... 21 Assign Hot-Key.............................................. 21 Audio Connections analog................................................ 26–30 digital ................................................ 27–29 Backup Bank............................................. 40, 41 Backup Drive ............................................ 40, 41 Backup/Restore ......................
Record Setup Menu ......................................... 20 Remote Input ................................................. 30 Restore From Backup ................................. 40, 41 sample rates ..................................................... 8 Sort Directory By............................................ 20 Stop.............................................................. 12 Symbols warning and information............................... 1 Transfer all cuts ...................................