
Specifications


63
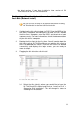
You can use the search facility provided to filter by keywords those
clients you would like view. Simply type some text in the search
field and those thin clients that do not match the text entered will be
filtered out of the list.
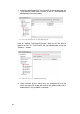
Screenshot 48: Search Button
Clicking the search button will then show a new toolbar with the
following search fields:
• Name
• IP Address
• MAC Address
• Username
• Status
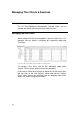
Setting thin client defaults
When a machine boots with the 2X ThinClientOS for the first time, it
uses the default settings in the default client. This can be accessed
by clicking on the “Default Settings” button inside the “Managed”
node under “Clients”.
The layout of the settings is exactly like that of a real ThinClient.
The difference is that those settings will affect all clients which have
no explicit custom settings.
The purpose of this option is to quickly set common settings which
exist in your current scenario due to a particular manufacturer or
country. First boot a test thin client and make sure that you have
identified all settings that are required to boot it correctly by editing
the thin client itself. Once you think you have a good template, copy
the common settings to the “Default Client” so that they will be
automatically inherited by all your other clients.
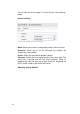
Editing thin client settings
To edit any thin client settings, simply click on the thin client name.
This will load the details in the bottom frame of the page.