
Specifications

39
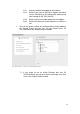
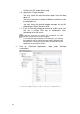
1. Click on the “Directory” node under “User Profiles” from the
sidebar. This will show existing Directories. If you would like to
create a new Directory click on “New Directory”.
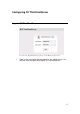
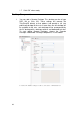
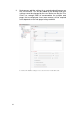
Screenshot 31: Configuring the Directory Server.
1.1. Domain Name: Enter the domain name containing the
users which will need to be assigned thin client logon
rights.
1.2. Host: Enter the fully-qualified domain name (or
alternatively the IP address) of an Active Directory server.
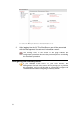
1.3. Host Mirror: Should the primary Active Directory server
fail, a mirror can be specified that contains the same user
information and can be used in such situations.
1.4. Username: Enter a username residing within the selected
domain which has read access to the directory. It is
recommended to create a separate user for 2X
ThinClientServer with a password that never expires. No
data will be written to the Active Directory. The username
should be in the format user@domain.com.
1.5. Base DN: The Base DN connection string will automatically
be displayed. If you are familiar with LDAP and Active
Directory, you can edit this string to filter out results you
don't need. A default Base DN is suggested when you type
in your domain name. This should let you browse all your
Active Directory for users.
1.6. Password: Enter a password needed by the Active
Directory to authenticate the user specified above.